Flip Top Table
Roll it in. Flip it. Nest it away.
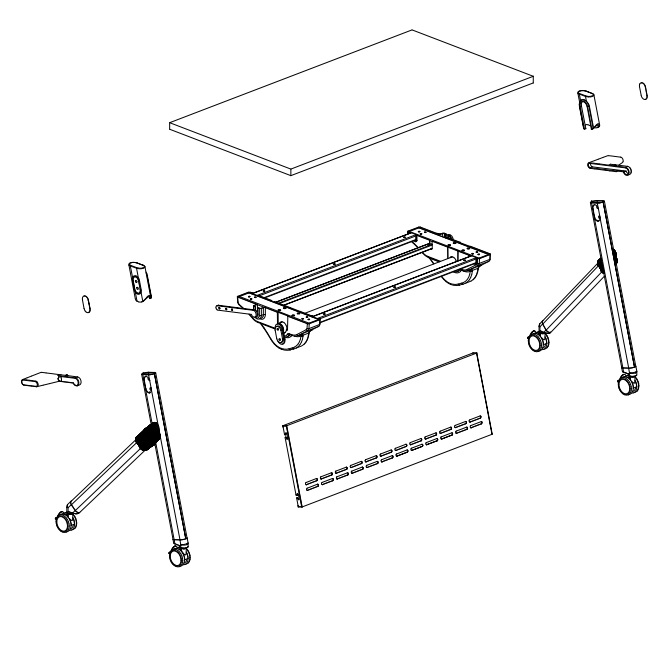
Troubleshooting guide, followed by everything you need to assemble your IOF flip top table — what's in the box, the twelve-step build, and how to use the tools without stripping a thing.
Use the tool right. Build it to last.
Most assembly problems trace back to one of these. A few minutes here saves a stripped screw or a wobbly table later.
Using the hex (Allen) key
- →Seat the key fully into the screw before turning. A half-seated key rounds out the hex and ruins the head.
- →Keep the key in line with the screw, not angled. Use the long arm for reach and the short arm for final leverage.
- →Clockwise tightens, counter-clockwise loosens. If it binds early, the screw is cross-threaded — back it out and restart by hand.
Power drivers & over-tightening
- →The hex bolts are meant to be hand-fastened
- →Over-tightening strips the frame threads, cracks the laminate, or snaps the head. "Snug" means no movement and no gap — then stop.
- →Under-tightening leaves legs and casters loose, and fasteners back out as you roll. Re-check every bolt after the first day of use.
Driving into the worksurface
- →Drive the wood screws slowly on a low setting. High speed setting may cause damage to the work surface.
- →Don't swap in longer screws — you'll punch through the work surface. Use only the screws supplied.
Casters won't seat / table rocks
- →If a caster won't push in, check the stem is straight and the leg end is clear, then press firmly until it clicks.
- →A rocking table usually means one caster isn't fully seated or a leg bolt is loose — re-seat and re-check steps 4–6.
- →On uneven floors, confirm all four casters touch before loading the top.
Top won't flip, latch, or nest
- →If the top won't sit square, confirm the pivot brackets (steps 1–2) are fully seated and both legs are bolted at matching heights (step 4). Remember, only the tool supplied and hand fastened bolts will provide a successful installation.
- →Always engage the flip latch before moving the table, and keep hands clear of the pivot when flipping.
Tape pads, spare parts & help
- →Peel the protective film fully before pressing the tape pads (step 7). Align once — the bond is permanent.
- →Missing or damaged parts? Contact your IOF dealer with your model number and the page reference.
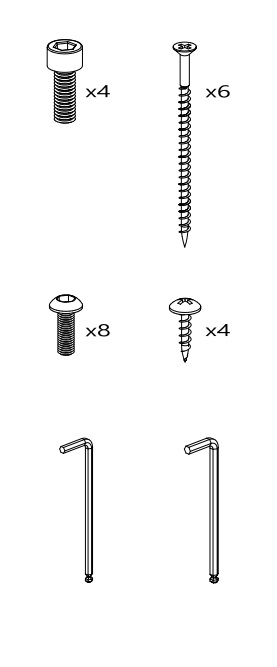
A Phillips screwdriver, an adjustable wrench (for the casters), and a power drill/driver on a low setting for the worksurface. Both hex (Allen) keys are included in the bag.
The Build · Twelve Steps
Tap to expand
▼
Work on a clean, padded surface. Start every fastener by hand to find the thread, then tighten. Numbers in a circle key to the parts above; a × badge means repeat the step on the opposite side.
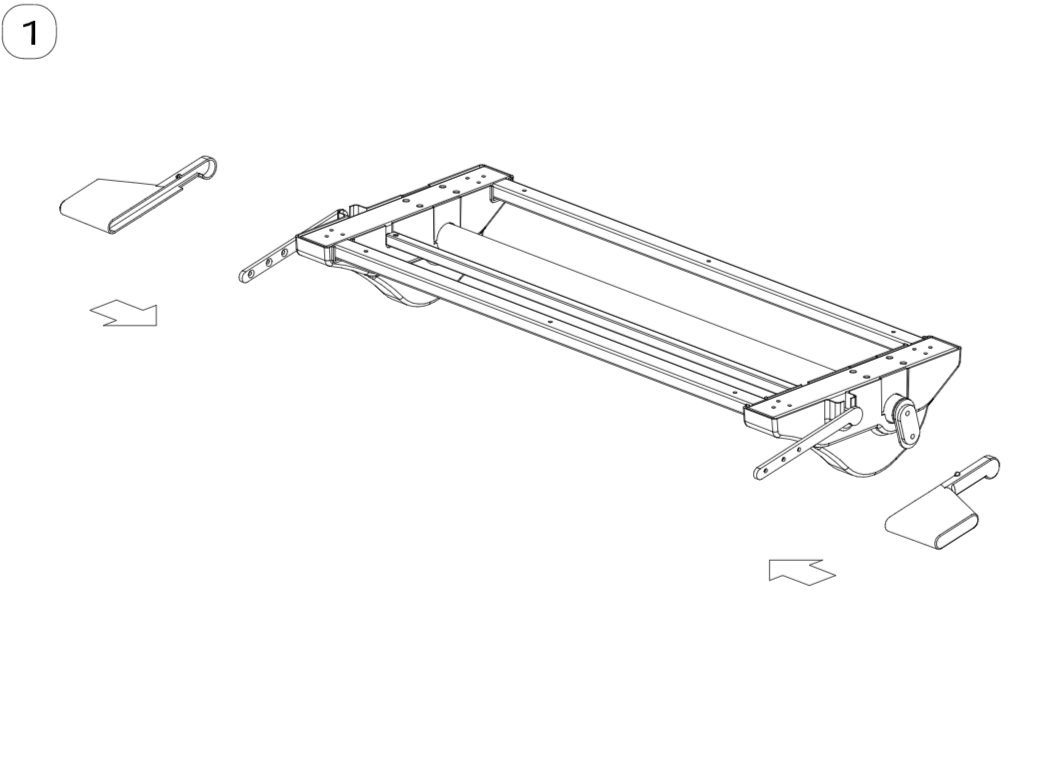
Set a leg-pivot bracket at each end of the base frame as shown, and press it home in the direction of the arrows.
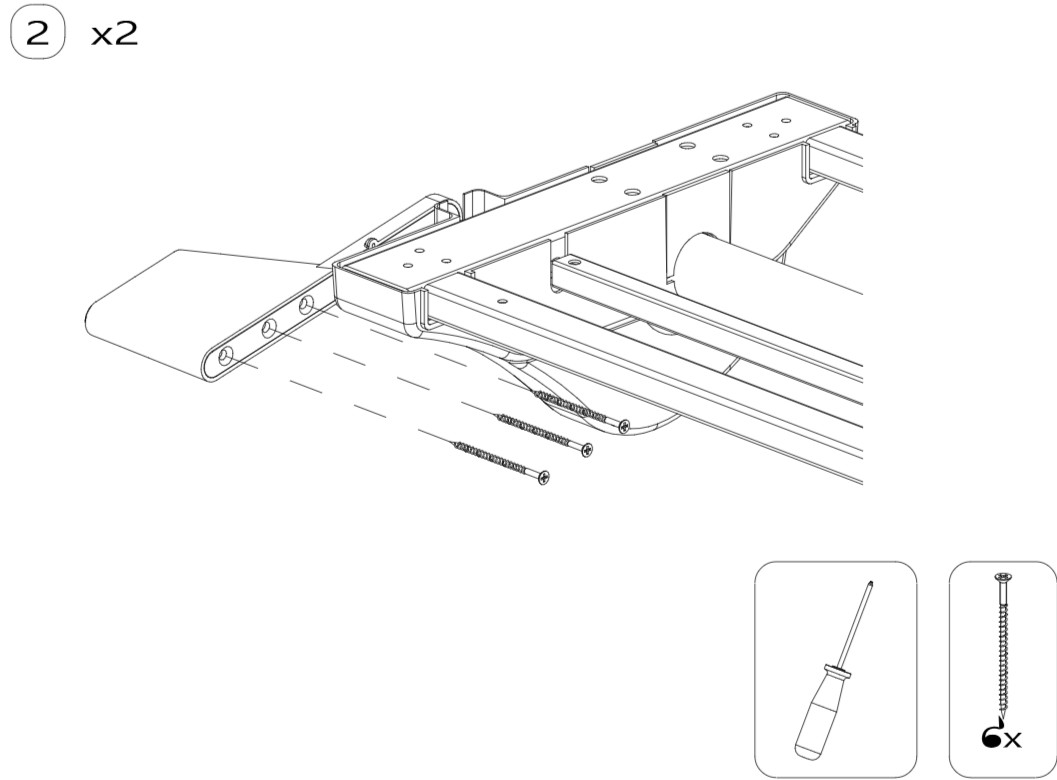
Drive wood screws up through the frame into each bracket until tight. Repeat on the opposite end.
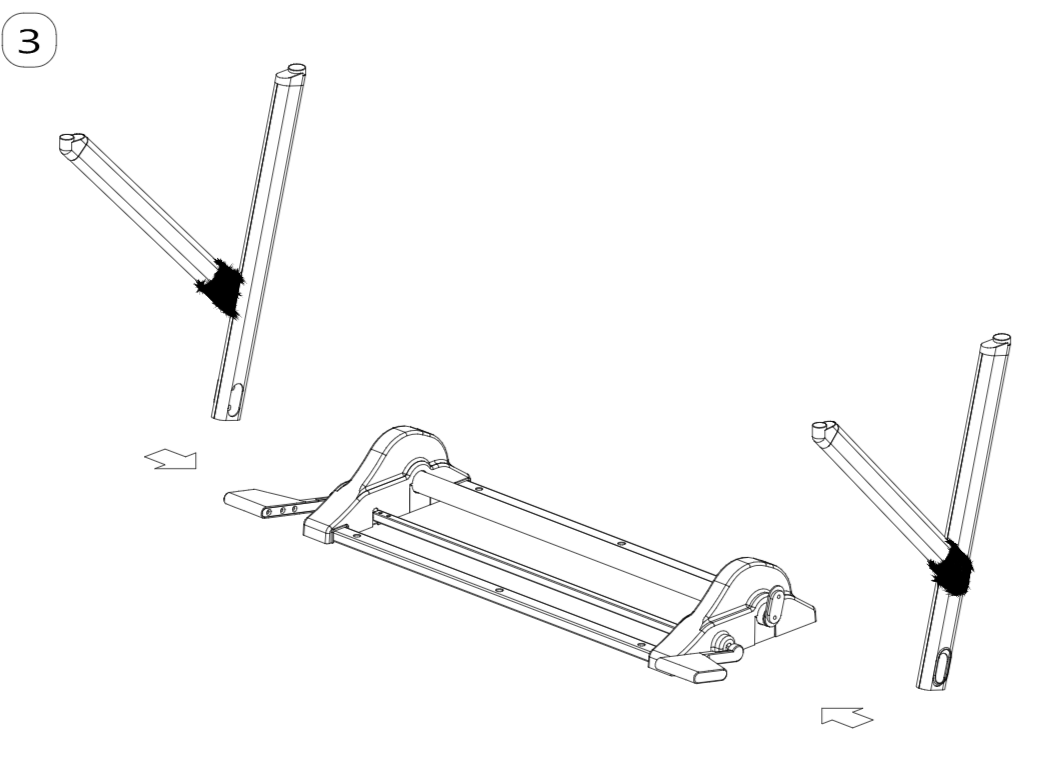
Slot a leg into each pivot bracket, lining up the bolt holes before fastening.
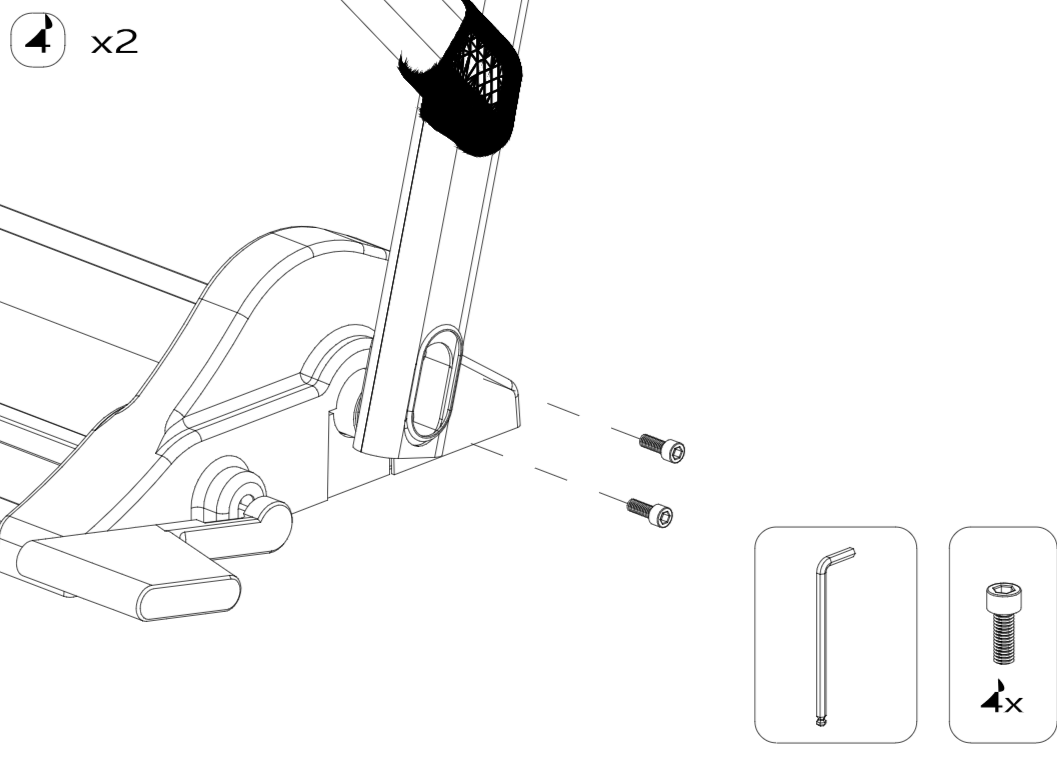
Fasten each leg to its pivot with the supplied hex bolts. Start by hand, then finish snug with the hex key.
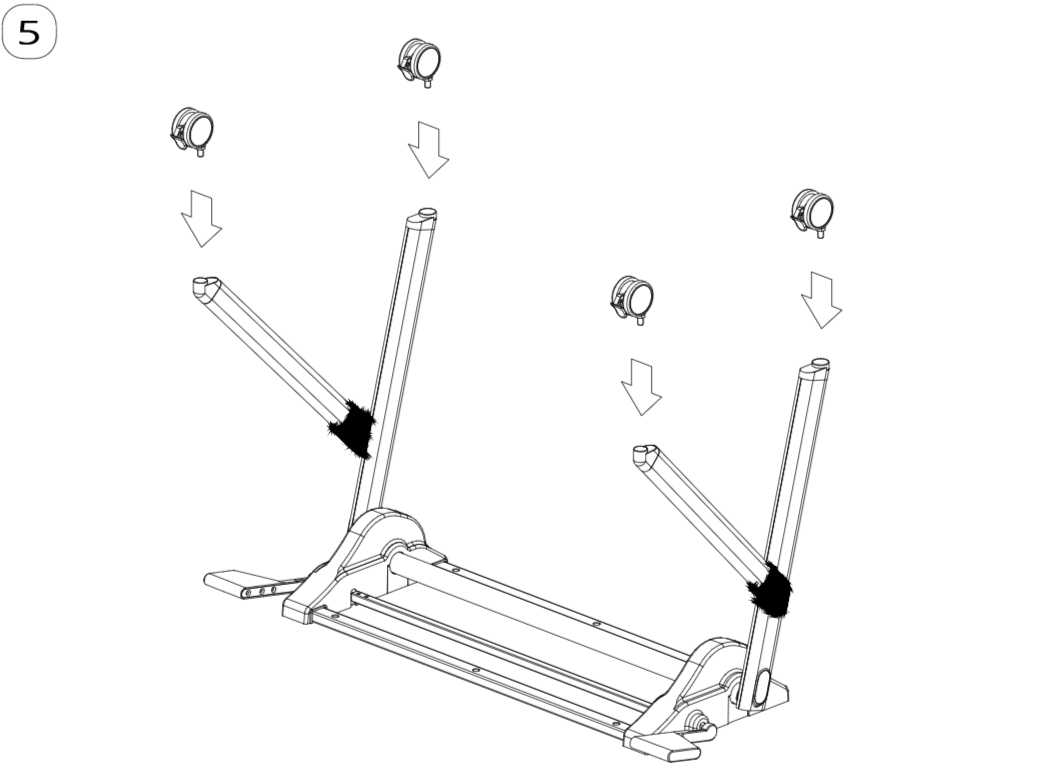
Push a caster firmly into the open end of each leg until it seats with a click — one per foot.
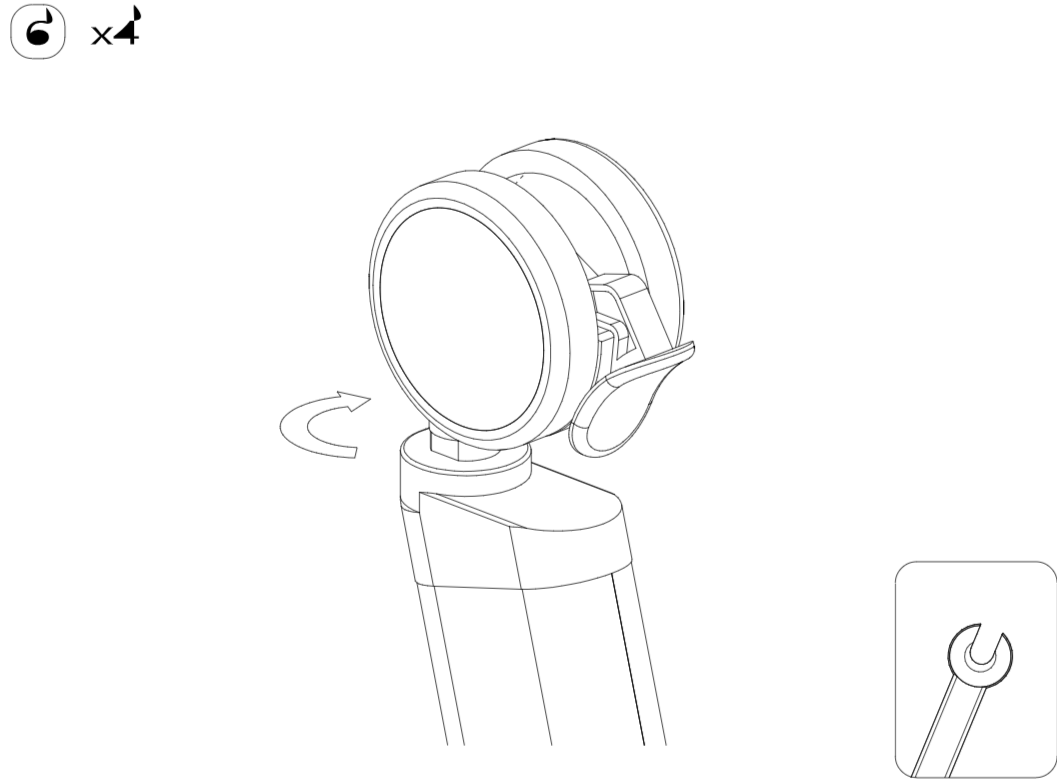
Rotate each caster to seat it fully, then snug the stem with an adjustable wrench.
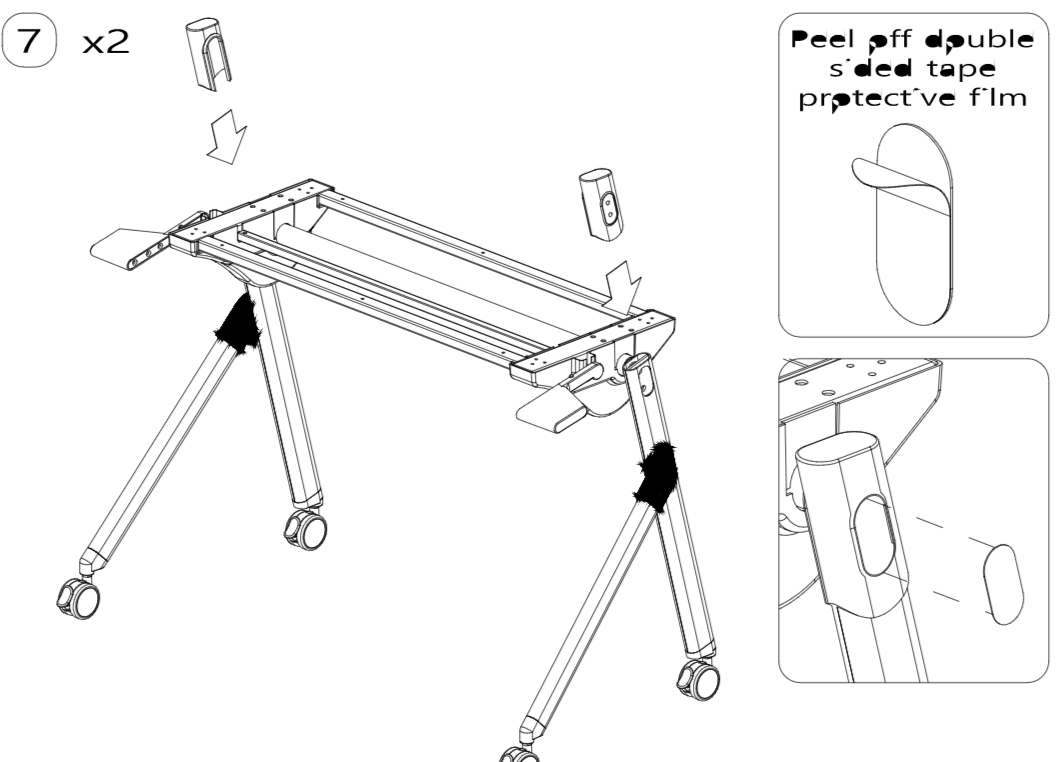
Peel the film from the double-sided tape pad, then press each end cap onto the upper frame. Align once — the bond is permanent.
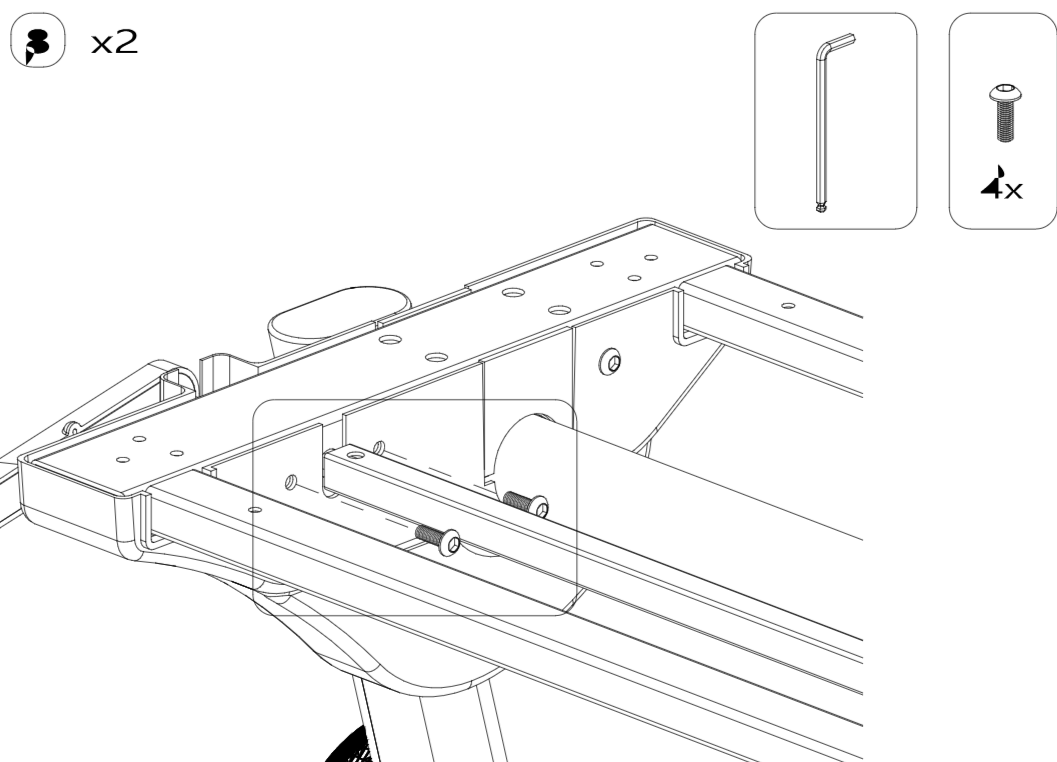
Attach the centre spreader to the frame with hex bolts and tighten with the hex key.
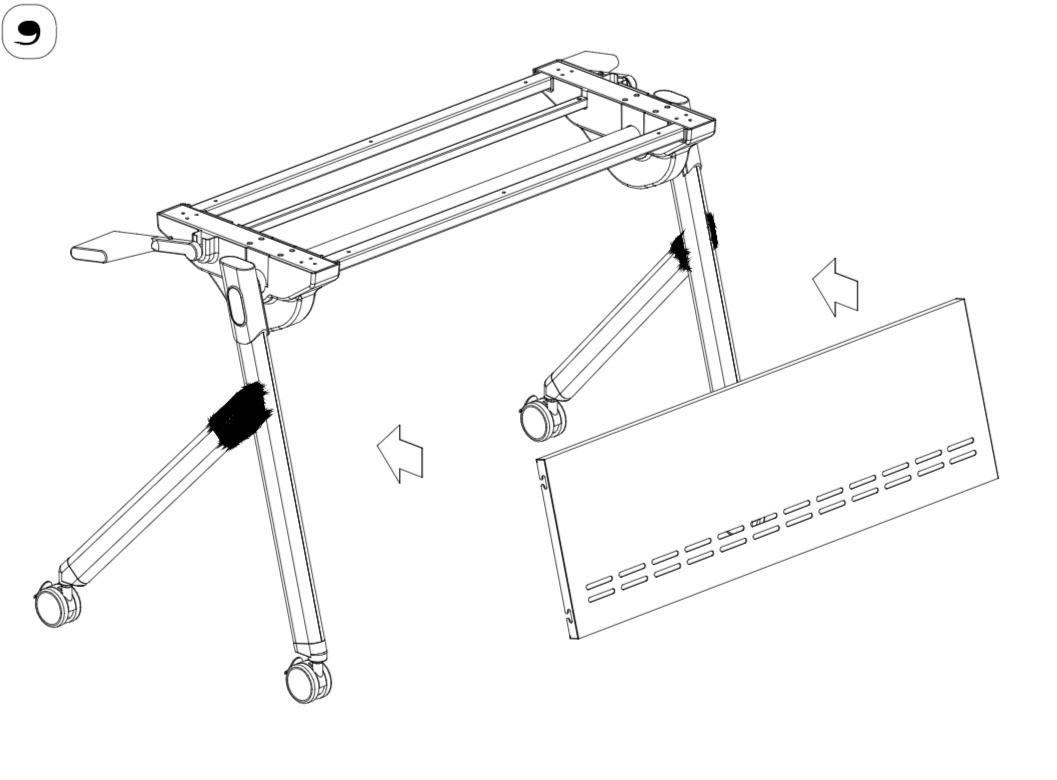
Hold the vented modesty panel against the underside of the frame, slots facing outward.
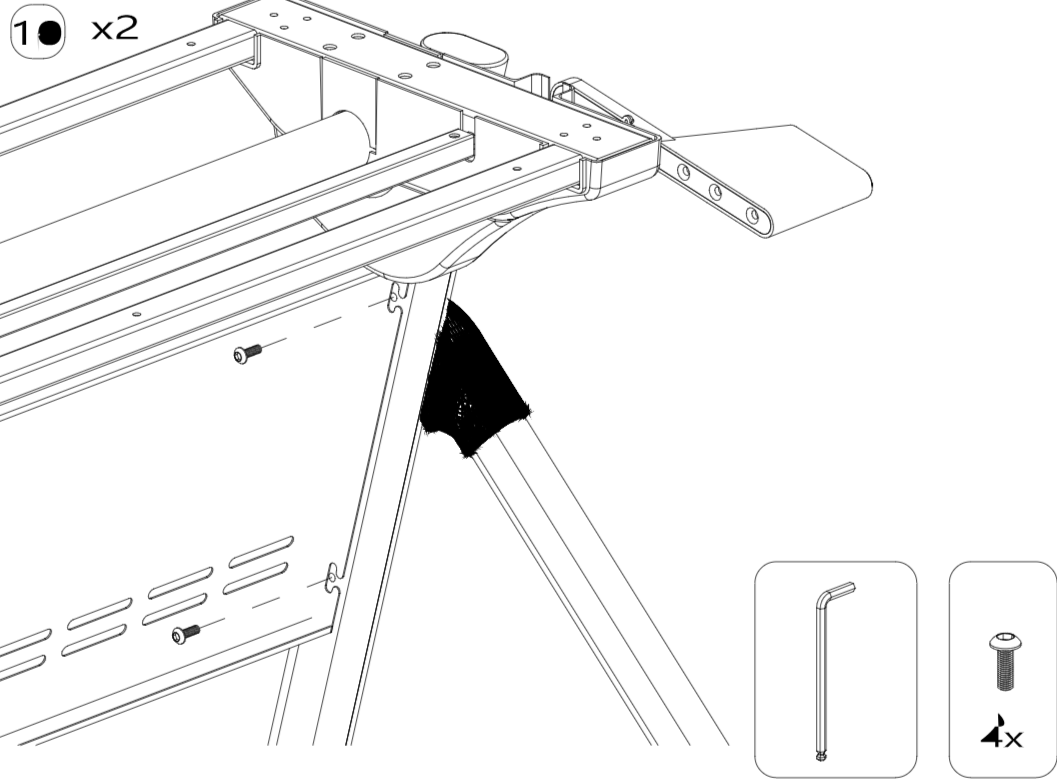
Drive hex bolts through the frame into the panel; snug each one with the hex key.
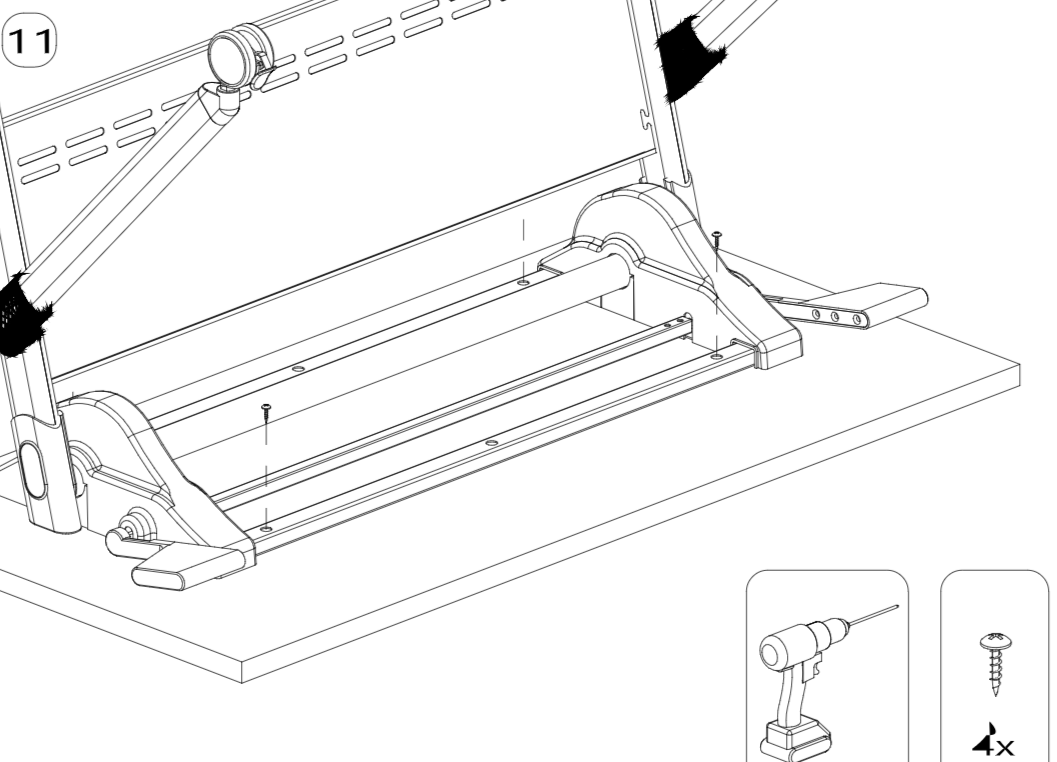
Set the frame on the underside of the top and drive the pan-head wood screws — power driver on a low setting, finish by hand.
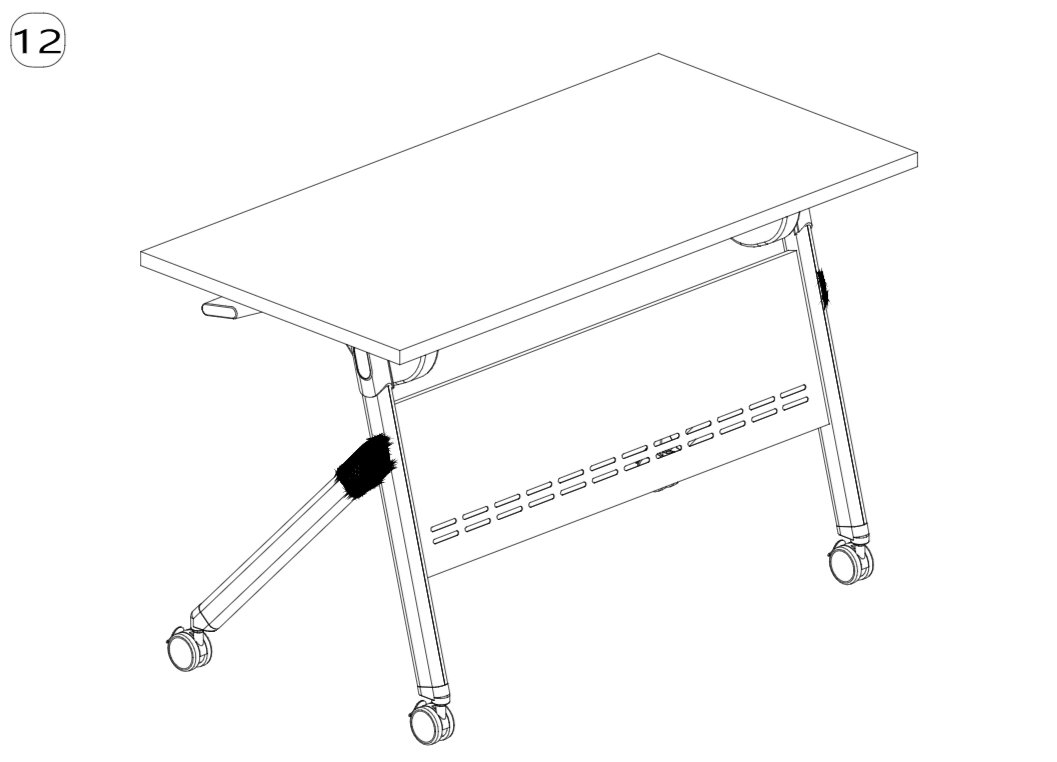
Tip the top upright to lock it, or flip it down to nest the table and roll it away. Done.